The cabinets are 24" deep. To be able to properly attach granite tile as the overhang meant it needed cement board behind it. Since the overhang tiles would be up underneath the counter top tiles, the countertop tiles would end up being the entire depth of the counter + the overhang tiles. 24" + 1/2" cement board + thinset + 3/8" tile = the countertop depth is now ~25". Using two 12" tiles would mean there would need to be a 1 inch strip of granite tile somewhere on the countertop. Not the look we wanted. We could lay the tile diagonally, but again, not the look we wanted.
So, "inventor Dustin" to the rescue... We decided to can the tile front in favor of a wood front, stained to match the cabinets. But having it all wood would be boring. So I came up with an idea for a design but wasn't sure if I could put all the pieces together. I decided to inlay a strip of brushed stainless steel in the wood. This ended up to be as much function as fashion. Off to the internet to see what a bar of 1/8" x 1/2" x 8' stainless steel would cost me. Allmetalsinc.com! Success! Precision cut to within 1/32" of the requested measurement. And I can get the 8' piece and a 30" piece for the side for about $40 including shipping. Hmmm... It's raw stainless steel. How can I brush stainless steel to get the look I want? Off to the internet! Excellent. Looks like I'll have some luck with a belt sander. Sold!
I spent some time figuring out the design, but ended up I could only do the inlay in one place because I needed to use that inlay space to hide the screws that would hold the front in place. The countertop was built up with two 1/2" pieces of plywood and 1/2" cement board. The front, for stability, needed to be attached to the 2nd layer of plywood, so that's where the inlay had to be. Below are some pictures along the way:
End of the bar front after having Karen's brother router the pieces to my specification (Thanks, Mark for the use of your router table!) This shows the contour of the bar front piece. The upper left notch is where the tile will go and is meant to accomoate 1/16" grout lines. The channel on the right is where the screws will go to fasten it to the counter and where the stainless steel inlay will be.
Staining to match the cabinets
The is the raw stainless steel bar I ordered off the internet
"Brushing" the stainless steel with a belt sander. Karen had to put the camera down and come sit on the piece I was working on because I needed two hands to get more force. I had to make sure I was keeping the belt as parallel to the stainless steel bar as possible so the brushing effect was straight. P.S. Freshly brushed stainless steel takes quite a while to cool off. Don't touch!!!
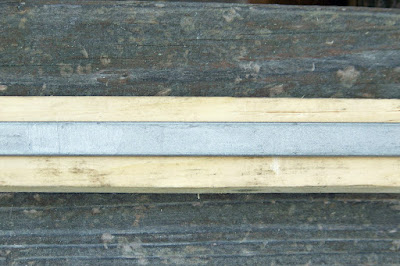
The after-product: Brushed Stainless Steel
What the finished product will look like when installed. Sorry for the bright spot... After this picture was taken, we actually stripped the the piece down, restained and refinished it. It was too dark and didn't match the cabinets closely enough.
Actually, after it was all said and done, this looks way better than having a granite tile front.
Coming soon: The bar front install, tiling and upper cabinet installation! And our carpet order is supposed to be in by mid-week. Installation of THAT should be this week or next!


No comments:
Post a Comment